Bead Gecko
- The Crafty Rancher

- Oct 7, 2019
- 4 min read
Bead geckos are a fun and easy craft for children and adults. You can make them into key chains or put a collar on them and keep them as a pet. Traditionally made from pony beads, they are a cheap craft project that are great for keeping grandchildren and children busy. Once you learn the general pattern for creating bead geckos, you can make them a variety of colors with many different patterns such as solid body colors, stripes, different colored feet than the center color etc. The possibilities are endless! When you want more of a challenge, make mini geckos out of seed beads and sewing thread. To download a printable PDF version of the instructions, click the following link: https://static.wixstatic.com/ugd/a6eaab_dd841f64cb364e849e6f0817e33fa8be.pdf

You will need:
· 36 outside color pony beads (for the body and legs)
· 21 inside color pony beads (for the toes, center of the body and tail tip)
· 2 eye color pony beads
· 3.5 ft. string (Yarn, plastic lacing, embroidery thread, or whatever you have that’s similar)
· 2.5 inches pipe cleaner (optional for collar)
· Key ring (optional if you want to make it a key chain.

1. If you are using a string that tends to fray, like yarn or embroidery thread, tie a knot on the very end of each end of your string. This will help make it a lot easier to thread beads.

2. String one of the outside color beads on one end of your string.

3. Take the opposite end of your string and thread it through the bead in the opposite direction from the first string, so the string forms a loop.

4. Hold both ends of the string evenly and pull them evenly until the bead reaches the center of your string.

5. Now string two outside colored beads on one end or your string. Then thread the other end of your string through the beads in the opposite direction. The easiest way to do this is to hold both strings together and push the beads, one at a time, back down the first string until they go over the second end.


6. Once both strings are going through both beads, but in opposite directions, pull both ends until the two beads meet up with the first bead in the center of your string. Pull the strings snug so the beads are all close together.

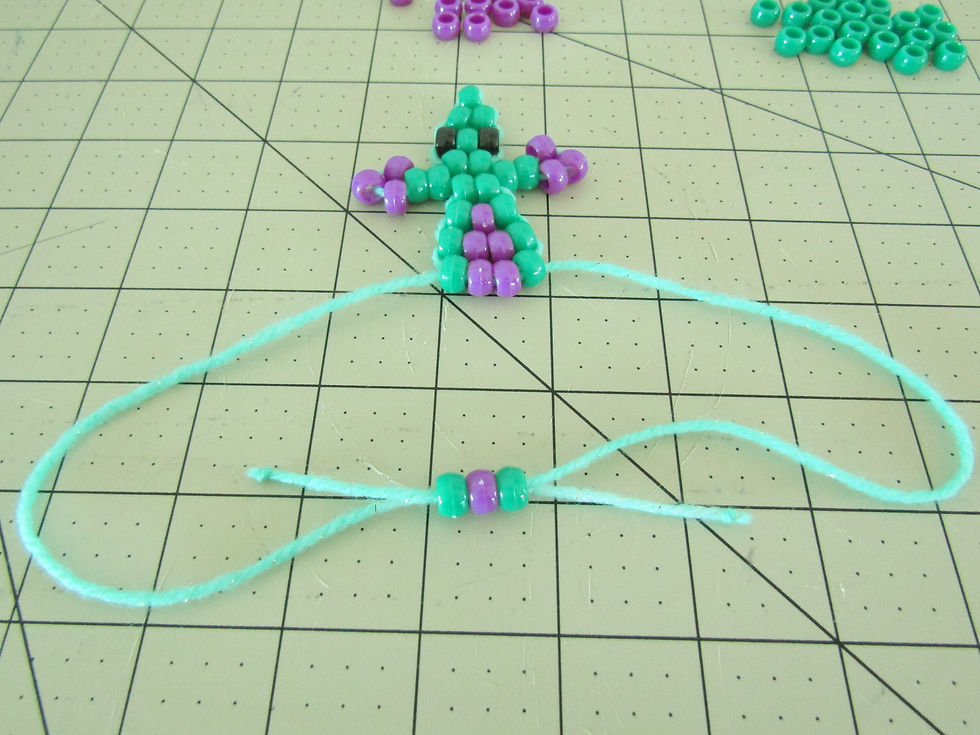
7. String on your next row just as before, using one eye color, one outside color, and another eye color.

8. Pull the strings to make this row snug to the previous ones. This is how most of the gecko will be made.

9. Use two outside colored beads for the next row, to make the neck.

10. Now form the first leg by stringing two outside color, then three of the inside color onto one string.

11. Now take the same string and thread it back through just the two outside color, in the opposite direction (as if it was going back out of the beads) to make the toes and leg.

12. Pull the string through until it is snug and the three inside color look like three toes and the leg meets with the neck.

13. Repeat the same process for the other front leg, using the other end of the string.


14. Now thread two outside color on for your next row, just like before with both strings going through both beads but in opposite directions.

15. Next add one outside color, one inside color, then one outside color for the next row to start forming the body.

16. Next row; one outside, two inside, one outside color. Repeat this row twice.

17. Be sure to pull every row up snug to the one previous to it before adding the next row.
18. Now thread a row of one outside color, one inside color, one outside color.
5. Next add a row of two outside color.

6. Now make the back legs the same way as you made the front, threading the two outside color for the leg then the three inside color for the toes and then back through just the two leg beads.

8. Now do the other rear leg as before.

9. After the back legs are finished, add a row of two outside color.

10. Make the tail by adding one outside colored bead at a time.

11. Continue until you have eight rows of one bead.

12. Now make the tail tip by adding a row of three inside colored beads.

13. Pull the row snug to the end of the tail, then tie the two ends of your string together in a knot between the tail end and tail tip.

14. Secure it with a second knot.

15. Flip the gecko over and double knot it again on the other side of the tail. This makes it extra strong in case you use it as a key chain

16. Trim the leftover string ends.

17. If you want your lizard to be a key chain you can put a key ring on the tail tip bead or through the nose bead.


18. If you want a collar, use 2.5 inches of pipe cleaner

19. Bend the pip cleaner so it will be about the width you want.

20. Wrap the pipe cleaner around and twist it around itself. Make sure the collar has a large enough loop so it is not too tight. Enjoy!


Comments